
How to add a React component to an HTML page?
React is a set of javascript libraries to build user interfaces.
Following is a simple example of adding a react component to your HTML page.
Step-by-step guide for adding a button component:
Step 1: Create an empty container in your HTML page where you want the react component to be displayed.
For e.g.

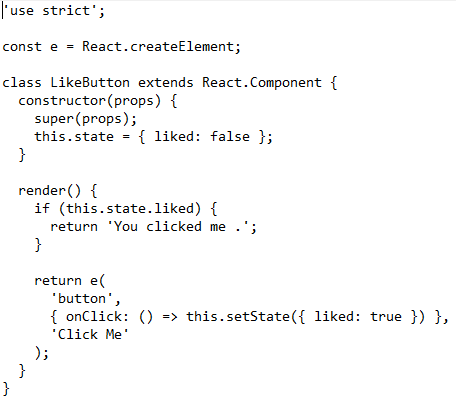
Step 2: Create a React component i.e. create a separate js file. This file will define the component.
In this example, our react component is a button that will be displayed in the container that we have created
in step 1.
You can define components as either classes or functions in React. Here, we're creating a class component.
You need to extend 'React.Component' to define a react component class. It is also
mandatory to define the render() method in the subclass.
The constructor of the component is accepting an arbitrary input 'props'.
'props' is one of the instance properties. Here, we are sending 'props' as an arbitrary input to react component which in turn
returns the React elements describing what should appear on the screen.
Lastly, the state is a user-defined instance property.
The data specific to this component is contained in the state, and this data may change over time.
Step 3: Now, further, add the below 3 lines of code to your js file that we have created in step 2.
This code will finally render the react component in the empty container that we have created in step 1.

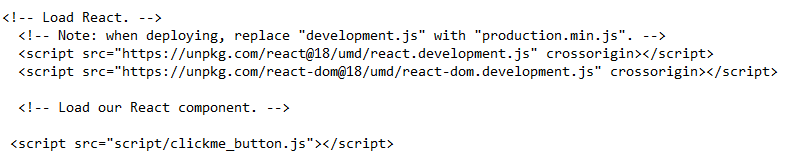
Step 4: Add the following script tags to your HTML page right before the closing body tag to load the React libraries and the react component.
Remember: Don't forget to replace the development.js with production.min.js when deploying.
Step 5: Now launch your HTML page in the browser and see the react component displayed in the container.
Clicking this button will display the text - "you clicked me" and hide the button.
The below images depicts the appearance and behavior of react component on your webpage.
Before click:

After click: