
How to push the entire project in the Bitbucket or GitHub repository?
Git is an open-source distributed version control system. Whereas Bitbucket and Github are the repository hosting services that use the GIT version control system.
The Bitbucket is owned by Atlassian which offers free as well as paid plans to manage the source code
whereas Github was developed by Tom Preston-Werner, P. J. Hyett, Scott Chacon, Chris Wanstrath in 2007-08
and currently, it is an open-source community.
These hosting services offer different plans for private and public repositories and offer other source code management services.
Choose suitable hosting services by visiting their web interface and check the services and plans.
For Bitbucket- visit https://bitbucket.org/ and sign up
For Github- visit https://github.com/and sign up.
Once sign up is completed, you can create a new repository.
Creating a repository is pretty much straight forward.
Your newly created repository will be empty. Some people find it difficult to push their entire project residing in their local machine to
bitbucket repository for the first time.
Steps by step guide to push the project in the Bitbucket or Github repository:
1. Download the GIT version control system into the local machine.
2. Initialize the local project with GIT version control.
3. Link the local project with Bitbucket or Github repository.
4. Commit the code
5. Push the code from the local machine to the Bitbucket or Github repository.
1. Download the GIT version control system into the local machine
To download the Git version control system, visit https://git-scm.com/ Now go to the download section and download the Git as per the OS. Once the Git executable gets downloaded (Git-2.32.0.2-64-bit.exe), run the Git executable to set up the Git on the machine. Once the setup completes, go to the project directory, and right-click, click Git bash here. The command prompt will open and it will automatically point to your project directory.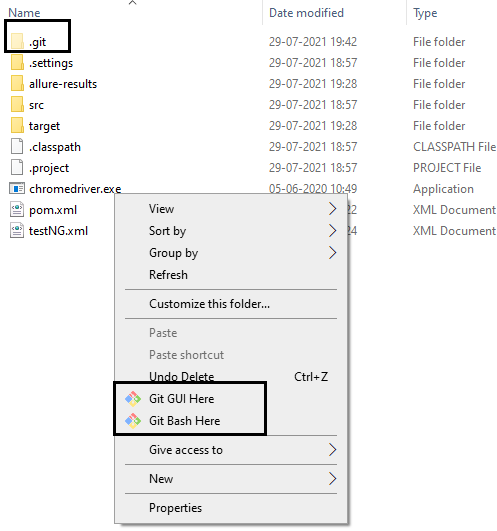
2. Git Command to initialize the local project with GIT version control
Initialization of Git on your project is required before performing any Git operation onto your project. To initialize the Git, just right-click inside your project directory and select Git bash here (as mentioned in the step above). Alternatively, you can also simply launch the command prompt and go to the project directory location and type the Git initialization command. Now type the below command to initialize Git onto your project.
'git init'.
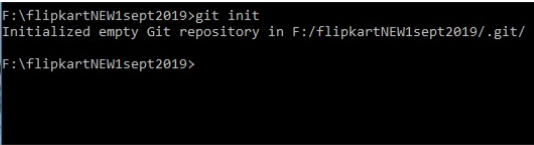
Once the Git init command executes, a .git folder gets created inside the project directory that contains Git-specific files, folders, and logs, etc.
3. Git command to link the local project with Bitbucket or Github repository
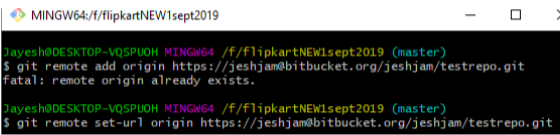
Now you have initialized git in your project root directory. The next step is to link your project with the Bitbucket or Github repository. To do so, you need to go to your local directory in command prompt or through git bash and run the following two commands:
$ git remote add origin https://jeshjam@bitbucket.org/jeshjam/testrepo.git
$ git remote set url origin https://jeshjam@bitbucket.org/jeshjam/testrepo.git
Here 'testrepo' is the name of our bitbucket repository while
https://jeshjam@bitbucket.org/jeshjam/testrepo.git
is the url of our bitbucket repository.
4. GIT command for committing the changes in the project
Git commit command is required to capture the snapshot of currently staged changes in the project. Commit the changes done to your code in the remote repository by giving the following command:
git commit -m "any message you want to give"

5. GIT command for pushing the code in the Github or Bitbucket repository
Now push your code to your remote bitbucket repository by giving the following command:
$ git push -u origin master
This will push the entire project into the master branch of Bitbucket or Github repo.
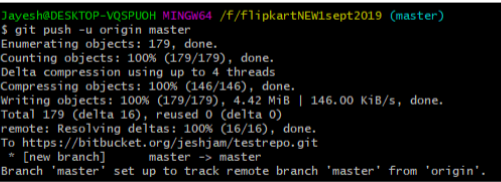
Once your project is merged in the master branch, your master branch will look like this:
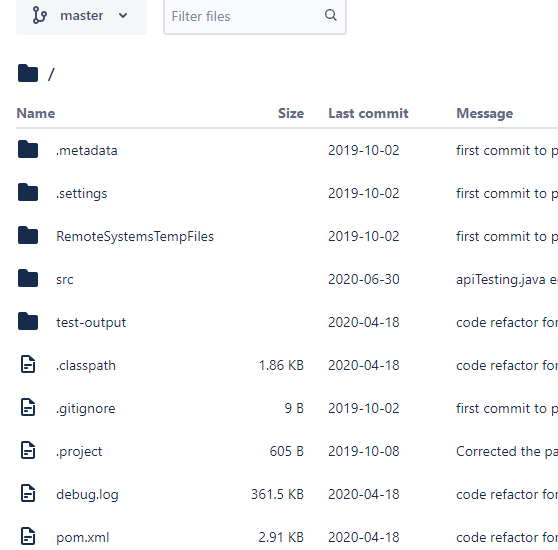
Now your entire project is merged in the master branch of your Bitbucket repository. You can give access to developers who are working on this project. They can create their branch in the same repository. Once they create their own branch, the code contained in the master branch gets copied into their branch. This is what we called a trunk-based system.
Here the master is our trunk, and whenever a branch is created from the master, the code contained in the master gets copied into that branch. Now the person or developer can import the code from that branch into his local machine, make his changes and commit and push his code back to his branch. His branch was already containing the code of the master branch, and now the changes made by this developer are also merged in his branch. We can say his branch is ahead of the master because the master branch does not have his changes yet.
Now he will create a PR which we call a Pull Request. This pull request is nothing but a request to merge his changes to the master branch. His pull request will be reviewed by a reviewer who might be a project lead or a lead developer. He will review the changes done by the developer and if he finds it fine, then he will approve his PR and merge the changes in the master branch. In this way, the master branch keeps getting updated.