


- AUTOMATION
- PERFORMANCE TESTING
- DevOps
- VERSION CTRL
- ONLINE QUIZ
- Number System MCQ - 1
- Number System MCQ - 2
- Number System MCQ - 3
- Simplification MCQ - 1
- Average MCQ - 1
- Simple Interest MCQ - 1
- Compound Interest - MCQ
- Percentage - MCQ
- Ratio and Proportion - MCQ
- Profit and Loss - MCQ
- Time, Speed, and Distance - MCQ
- Time, and Work - MCQ
- Boats and Streams - MCQ
- General Knowledge Quiz - Indian Polity
- General Knowledge Quiz - History
- General Knowledge Quiz - Geography
- GK Quiz - Indian Polity - 2
- GK Quiz - Banking and Finance
- GK Quiz - Economics
- GK Quiz- Merger and Acquisition
- GK Quiz- International Bodies
- English Grammar quiz-1
- English Grammar quiz-2
- S/W PROJECT MANAGEMENT
- MORE
Getting started with Selenium
To start with selenium webdriver, you need to have the following items installed on your machine.
Prerequisite:
JDK (java 1.8 preferable)
Selenium libraries (Nowadays there is single jar 'selenium-server-standalone.jar' is enough unlike earlier period where we need to install multiple jars),
Browser drivers (.exe of chrome driver, ie driver, gecko driver)
Eclipse IDE
Now that you have downloaded the minimum required elements to start writing selenium code, so let's start by setting up the environment:
Now select a java project:
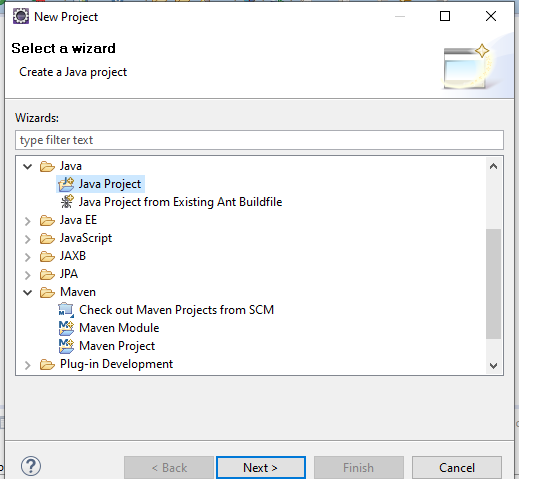
Give the project name and finish.
Now configure the build path where you need to set your downloaded libraries i.e. selenium jar files, also need to set JDK and JRE path in the java compiler section.
Right-click on your project and build path and configure build path.

Now select the libraries tab above and click add external jars. Add your downloaded selenium jars here:
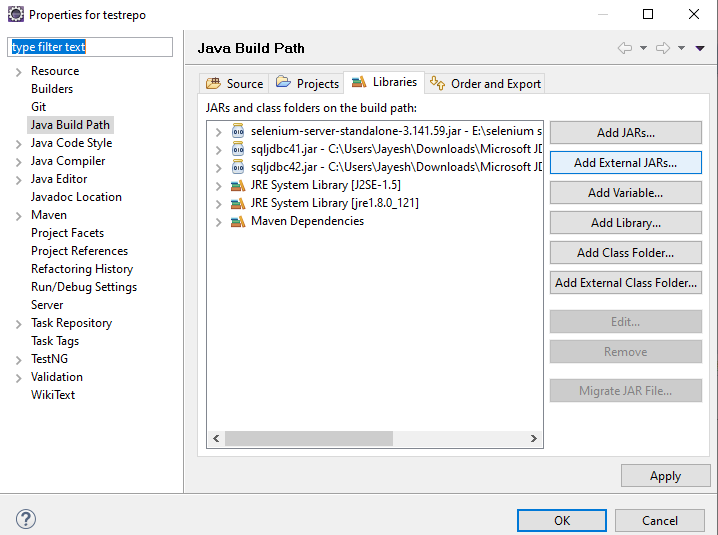
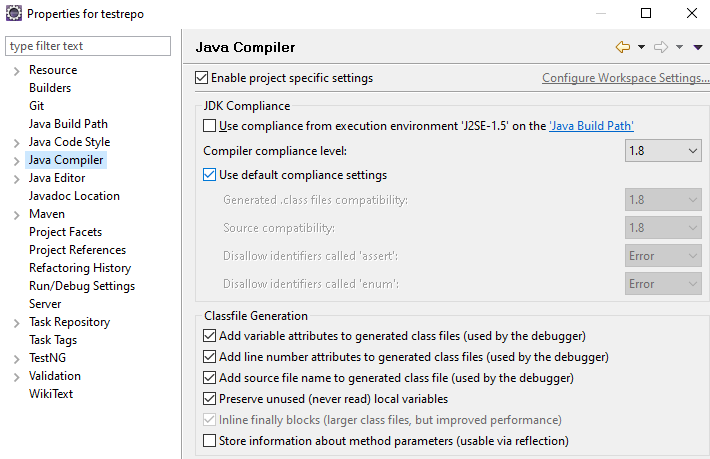
Also now don't forget to set your compliance level as per your JDK and JRE version.
For all your latest version of selenium, make sure the compliance level under the java compiler section must be set to java 1.8 or above.
Ignoring this might lead to a "class not found" run time exception during running your selenium test script.
Now that you have set libraries and compliance levels, it's time to write your first selenium code using java.
Right-click on your project and select create a new class.
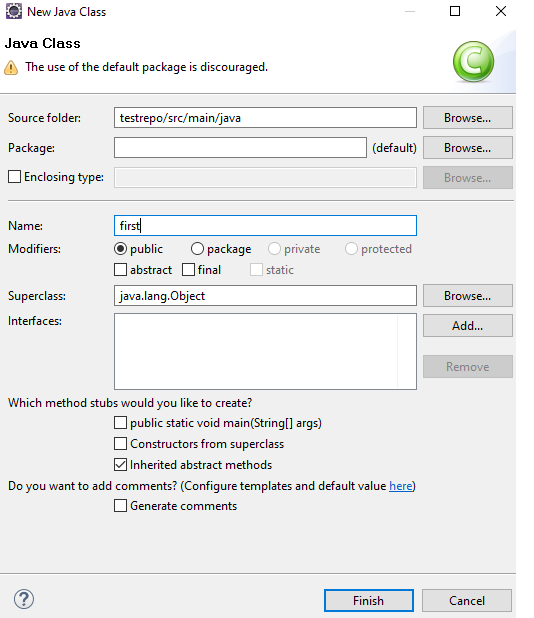
Give it a name, check "public static void main.." , click finish. You are creating a sample test, where we are not using any testNG, cucumber, or maven therefore we need to include public static void main in our first class to run the test as the java execution will begin through the class where the main method is defined.
In subsequent lectures, when we use testNG, cucumber, Maven, we will not use or include the main method as our execution will be taken care of by testNG or cucumber.
Now it's time to write our first test script which simply opens the browser and navigate to the site specified in the script.
We'll write the code and understand the meaning of each one of them.
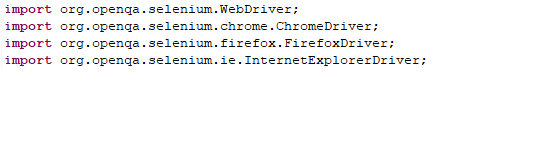
In our class, first include the required packages and classes which come with selenium libraries.
Now at class level, that is inside the class but before the main method, declare a webdriver instance variable:
Webdriver driver;
Now inside our main method, write code to set system property:

Here setProperty method is accepting two parameters in the form of key and value. The first one is the string parameter in which we are telling that we are going to use a chrome driver, and the second is also a string parameter where we are placing an entire path till the driver's exe.
Now in the next line, we've initialized the driver with chromeDriver. This piece of the line will open the chrome browser upon execution.
Now our browser is open, and we want to navigate to any site. This task will be done by driver.get(""); method.
So driver.get("
INTERVIEW TIP:
Why we cannot write Webdriver driver=new Webdriver();
Since webdriver is an interface
therefore we can create its instance variable but cannot create its object. i.e. we cannot write
Webdriver driver=new Webdriver(); this will throw error.
We can rather write Webdriver driver =new FirefoxDriver(); or Webdriver driver=new ChromeDriver();
or Webdriver driver =new InternetExplorerDriver();
These FirefoxDriver, ChromeDriver, and InternetExplorerDriver are the actual classes which implement
the webdriver interface and provide implementation to its methods. So we are assigning the instance
variable of webdriver to its implementation classes.
SUMMARY
In this lecture, we've installed basic minimum items required for running and executing our first selenium script. We've installed JDK, eclipse, selenium libraries, drivers exe's for browsers. We've created a java project, set all the libraries in our project' build path, created a class, and imported the packages and classes needed to execute our test script. We've written the code to set system property, initialized our driver object, open the browser, and finally lands at the site specified in the driver.get("
In the next section, we'll learn how to find different locators or web elements before performing any operations on them. Finding Locators